Learn how to enable Readyboost, a feature which aids in system performance, on USB hard drives and SD cards that it does not support.
Are you looking to enable Readyboost for your flash drive?
In a previous article we described what Readyboost is – a disk caching technology introduced in Vista that allows use of a USB flash drive or SD, MMC and TF cards as added virtual RAM for your computer. We described thoroughly how to activate ReadyBoost, as well as clearly noted that ReadyBoost does not offer a significant performance boost. However, it might be worth it – you will only know if it works for you when you try it personally, on your own system.
Visit that popular post here.
We also let our readers know that not all external media can utilize Readyboost – some old or slow USB flash drives might not pass the test.
How do I know if my device is suitable?
Before even running the test, you might be able to get an idea by checking the system requirements of Readyboost:
- The flash key should be at least 256 MB in size, with at least 64 KB of free space.
- It should have an access time of 1 ms or less.
- Should have abilities of at least a 2.5 MB/sec throughput for 4 KB random reads.
- Should have at least a 1.75 MB/sec throughput for 1 MB random writes.
As you understand, older and over-used devices often cannot meet these requirements, especially on the issue of read and write speeds – essentially, a USB flash drive does have a limit of read and writes in its life, after which its performance significantly deteriorates.
So, you might ask – what happens if I only have one flash drive to spare because I do not want to use my brand new device in ReadyBoost?
Is there a way to force enable Readyboost?
This is where this guide might be helpful for you. Even if you have a device that is not supported. We will describe a work-around that will allow you to enable ReadyBoost for your device. You will accomplish it by “tricking” the operating system into thinking the device is fast enough.
Disclaimer: This article will guide you into editing a Windows Registry entry. If you follow it exactly, there should not be any problem at all with your system. If you make mistakes, we are not to blame for the problems you might cause.
Step 1:
Insert USB flash drive in your USB port directly, not on a USB hub. Make sure the USB is installed properly and close the AutoPlay window that might pop up.
Step 2:
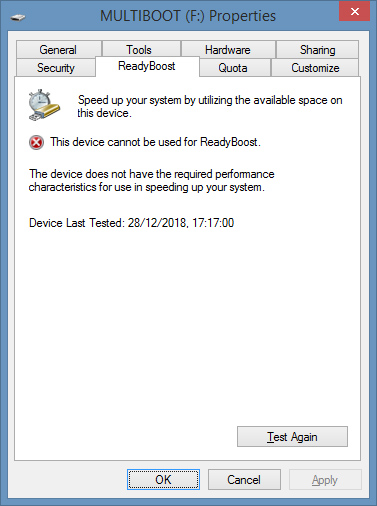
Open This PC, right click on your USB flash drive and select Properties.
Step 3:
Select ReadyBoost tab and tick the box that says Do Not Retest This Device.
Step 4:
Start search and type regedit. This will open the Registry Editor.
Step 5:
Navigate to the following registry entry:
HKEY_LOCAL_MACHINE\SOFTWARE\Microsoft\Windows NT\CurrentVersion\EMDMgmt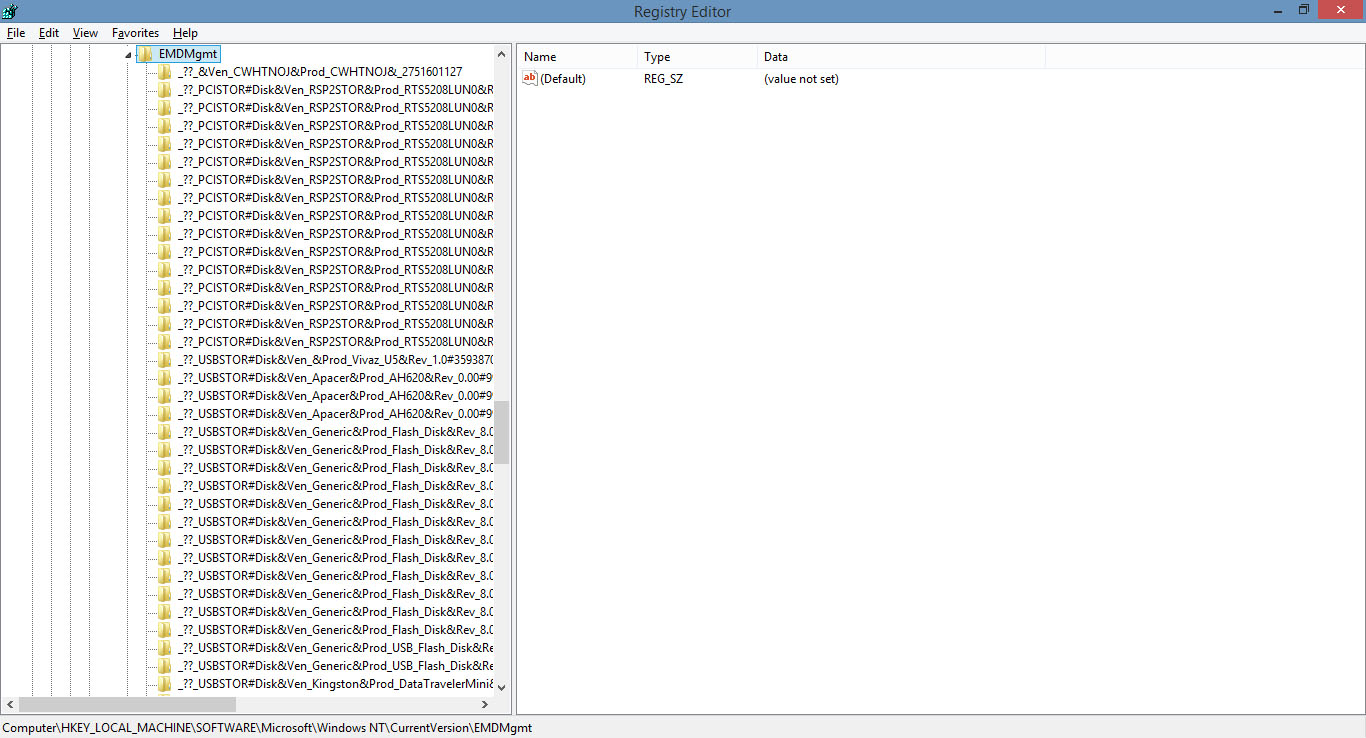
As you see in the image, all the USB drives that have been detected in the past are shown here – each line is a flash drive, and the pattern goes like this:
_??_USBSTOR#Disk&Ven_Verbatim&Prod_VApps_Drive&Rev_2.67#1E75E5683884D150&0#{53f56307-b6bf-11d0-94f2-00a0c91efb8b}YURI_551072571Near the beginning of this long line we notice the Verbatim brand and that helps us identify which USB flash drive we want to enable ReadyBoost on. Did you fail to identify your flash drive from this extensive list? Then try to find a product which has a value 4 at DeviceStatus. This would be a USB whose test that failed.
Step 6:
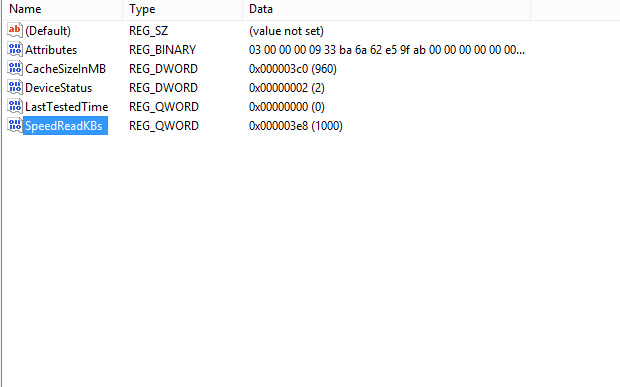
Double click on WriteSpeedKBs and change its value data to 1000 (Decimal) or anything larger than that.
Step 7:
Double click on DeviceStatus, and modify the value date to 2.
Step 8:
This step might not be required, depending on your device. Right click on the blank space in that selected USBfolder and click on QWORD (64 bit) Value and after that right click to rename the value to SpeedReadKBs and press enter. Now double click on that file and change the Value Data from 0 to 1000 and then press OK.
Step 9:
Exit the Registry Editor, locate your flash drive in This PC, tight click on it, select Properties and navigate to ReadyBoost. You might have to ask Windows to test this device again, and this time the window will present with the options to enable Readyboost.
So will this boost my system?
Keep in mind that this feature already offers a rather insignificant performance boost. Well, when you force enable Readyboost on a slower USB device you actually bring this boost to even lower levels. But hey – nothing to lose in trying, right?


Munashe
24 Nov 2021This is the only site that actually worked as compared to many youtube videos,,,thank you guys, really appreciate